Text only origami instructions for blind crafters and friends compiled by Lindy Van der Merwe, April 2010. Adapted by Lisamaria Martinez 2020.
What You Should Know
- Paper to be used square, any size
- Folding level: Beginner+ / Intermediate
- Steps: 17
Instructions
Note: This model starts from the waterbomb or balloon base. If you are able to achieve this without instructions, fold the base and go directly to step 9.
- Step 1: Place a square piece of paper down on a hard, flat surface with the edges oriented to the left, right, top, and bottom.
- If using two-sided origami paper, lay your paper with the patterned or colored side up before starting to fold.
- Step 2: Fold the left edge over to meet the right edge. Crease and unfold.
- Step 3: Fold the bottom edge up to meet the top edge. Crease and unfold.
- Step 4: Turn the paper over and orient your square so that it is a diamond shape on your folding surface. The points should be at the left, right, top, and bottom. You should feel 2 mountain creases that form an X.
- Step 5: Fold the left point over to meet the right point. Crease and unfold.
- Step 6: Bring the top point down to meet the bottom point. Crease and leave folded.
- Step 7: Pick up your model and grasp the left and right points. Push inward so that the model collapses along the pre-existing folds.
- The result will be another triangle (or pyramidlike) shape consisting of four flaps. Your left hand should be holding onto the left flap. Your right hand should be holding onto the right flap. There will be a loose front flap sticking out toward your face between your hands and a loose back flap sticking out and away from you behind your hands.
- Step 8: With your left hand, grasp the front flap and bring the two flaps together in your left hand.
- With your right hand, grasp the back flap and bring the two flaps together in your right hand.
- You should now be holding a triangle that consists of 2 layers. Put the model on your folding surface so that the point of the triangle faces away from you and the long open edge of the triangle is closest to you.
- Step 9: Next, grasp the left bottom corner of the triangle, top layer only, and fold it upwards and inwards to meet the top point of the triangle. The bottom left edge of the triangle will come up to lie straight along the center vertical crease of the model. Crease and leave folded.
- Step 10: Repeat with the bottom right point.
- Your model should now have a diamond shape sitting on top of a triangle.
- Step 11: Turn the model over like turning the pages of a book. Orient the model so that it is positionedwith the longest, open edge of the triangle facing away from you.
- Step 12: Bring all layers of the bottom point of the triangle up so its point just reaches over the straight edge at the top of the model. Crease well and leave folded.
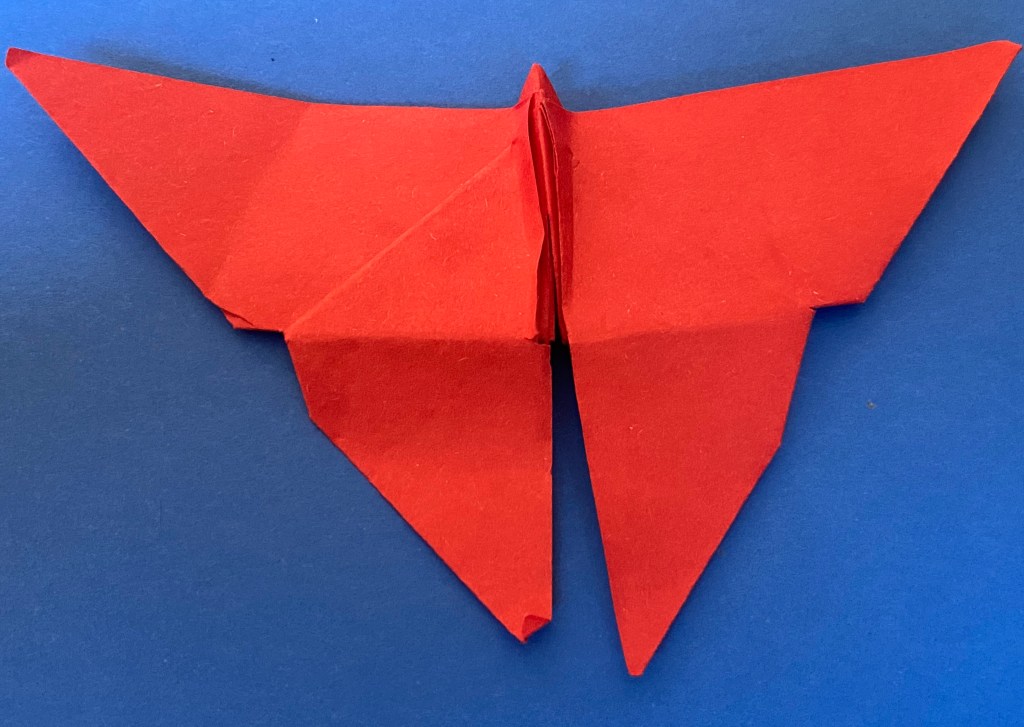
- The result will be a model with two triangular flaps lying next to each other in the center, with two large flaps, the wings, jutting out on either side.
- Step 13: Next, you will unfold the two center triangular flaps of the model, top layer only,towards you creating a diamond shape. As you do this, you will notice that at the left and right points of the diamond there are two small circular ridges that do not lie flat against your folding surface. You will have to press down and slightly inward in order for the model to lie flat.
- Your model should now have a triangle at the top middle, two large wings on either side and two separate upside-down triangles nearest you.
- Step 14: Fold over the entire left side of your butterfly to meet the right side. Crease well and leave folded.
- Step 15: To make the body of the butterfly, you will pinch a small crease right at the center of the model. To do this, pick up your model and hold it so that the two smaller triangles, the back wings, are pointing toward your folding surface and the larger triangles, the front wings, are pointing straight up in the air. The model should still be folded in half.
- Step 16: With the thumb and forefinger of one hand, hold the butterfly closed by pinching it at the tip of the larger wings. With your other hand, find the folded edge of the butterfly, just beneath where the point of the triangle peaks out past the top edge and pinch tightly. This is where the body of the butterfly will be formed.
- Step 17: Next, let go of the wings so that they can open to the sides while you press the model flat onto your folding surface while still pinching tightly the folded edge. As you press the wings flat, the pinched edge will become the center of the butterfly. A small ridge will form like a very pronounced small mountain crease that you can fold in either direction to make the body of the butterfly more noticeable.
Notes
General Uses:
- This model is known as the famous Akira Yoshizawa Butterfly.
- Use this model to make a pretty mobile or as decoration around the house for spring and other special occasions.
- Using small origami paper, lacquer the butterfly after folding, and join onto earring hooks as fashionable earrings.
